


Flossing with braces can be a bit tricky, but it’s an essential part of keeping your teeth and gums clean. With wires and brackets in the way, regular flossing takes a little more effort, but it’s worth it to prevent plaque buildup and avoid cavities.
This guide will walk you through a few simple methods that make flossing easier. Whether you’re using a threader, a flosser, or just getting the hang of threading around your wire, there’s a way to keep things clean and comfortable. A quick rinse with mouthwash after flossing can also help wash away anything left behind.
And if you ever feel unsure, your orthodontist or dentist can always help guide you. The right tools and a little practice can make all the difference in your routine.
Key Takeaways
-
Flossing is essential for braces wearers to remove plaque and food particles that toothbrushes can’t reach, preventing gum disease and cavities.
-
Using tools like floss threaders, water flossers, or orthodontic flossers can simplify the flossing process and help maintain oral hygiene effectively.
-
Regular dental check-ups and proper flossing techniques are crucial for achieving a healthy smile after orthodontic treatment.
Why Flossing Is Essential When You’re Wearing Braces
If you are wearing braces, flossing is not optional. It is essential for keeping your teeth and gums healthy throughout your treatment. Braces make it easier for food particles and plaque to get stuck around your brackets and wire, especially in places your toothbrush cannot reach.
When you skip flossing, all that buildup can lead to gum disease, tooth decay, and even slow down your progress. This is why orthodontists and dentists always recommend flossing daily. It helps with removing plaque and keeping your gum line clean, which supports overall oral health.
Flossing also prevents bleeding gums and irritation, which are common when food sits too long between teeth or under wires. A floss threader, dental tape, or water flosser can help make the process easier and more comfortable. These tools are especially helpful when you are threading floss around brackets and wires.
Without regular flossing, plaque can harden and cause more serious issues like cavities and gum inflammation. The goal is to start flossing daily and stick to a routine that keeps your braces clean and your mouth fresh.
Taking care of your oral hygiene while wearing braces helps you avoid long-term problems and leads to a cleaner, healthier smile when the braces come off.
What Happens If You Don’t Floss With Braces
Skipping flossing while wearing braces might feel harmless, but it can cause real problems for your gums, teeth, and the overall process of your orthodontic treatment. Here’s what can happen if you don’t stick to a solid flossing routine:
-
Plaque builds up fast around brackets, wire, and in tight spaces your toothbrush can’t reach. This increases the risk of cavities and gum disease.
-
Plaque left alone hardens into tartar, which is tough to remove without a dentist or hygienist.
-
You may develop gingivitis, which shows up as red, puffy, and bleeding gums.
-
Inflammation in the gums can slow down your tooth movement and extend the time you wear braces.
-
If left untreated, gum issues can progress into periodontitis, a deeper infection that affects the bone supporting your teeth.
Flossing is an essential part of maintaining your oral health with braces. Whether you use a threader, a flosser, or try a different method, the goal is the same, to clean where brushing alone cannot.
Try using mouthwash after you floss to help rinse away anything left behind. For some, a water flosser is a great alternative to traditional threading methods, especially for reaching tricky areas around brackets and wire.
If you’re unsure how to get started, your orthodontist or dentist can walk you through it. Keeping your mouth clean is a daily habit worth building for a healthy smile when your braces finally come off.
How to Floss with Braces Using Traditional Dental Floss
Traditional flossing may take a little more time when you have braces, but it’s still one of the most effective ways to keep your teeth and gum line clean. Here's how to do it step by step:
-
Grab your floss: Cut about 18 inches of waxed dental floss. Waxed is best because it’s less likely to shred around your wire and brackets.
-
Use a floss threader (optional): If you’re new to flossing with braces, a floss threader can help. Think of it like a plastic needle that guides the floss under the archwire. It’s super helpful for getting into tight spaces.
-
Thread the floss: Carefully slide the floss under the wire using the threader, then pull it through gently until you have one end in each hand.
-
Wrap and glide: Wrap the floss around one tooth and gently move it up and down along the side of the tooth and under the gum line. Be sure to go slow and avoid snapping the floss, which can irritate your gums.
-
Repeat the process: Move to the next tooth and do the same thing. You’ll need to repeat the steps for every one tooth, top and bottom. Yes, it takes time, but it’s worth it.
-
Finish with a rinse: After flossing, use a mouthwash to rinse away any leftover debris and keep your oral hygiene fresh.
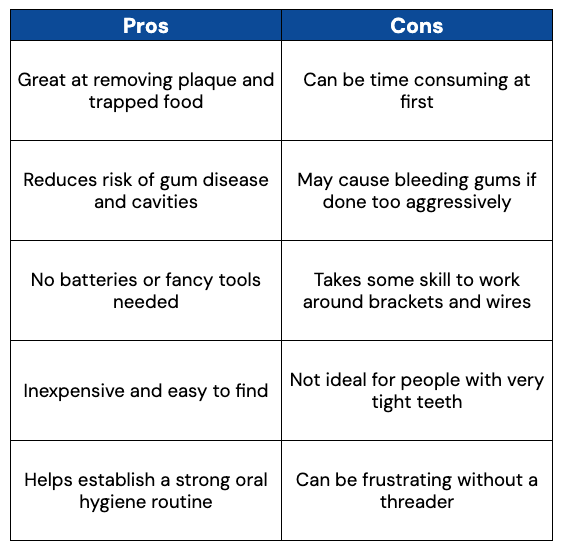
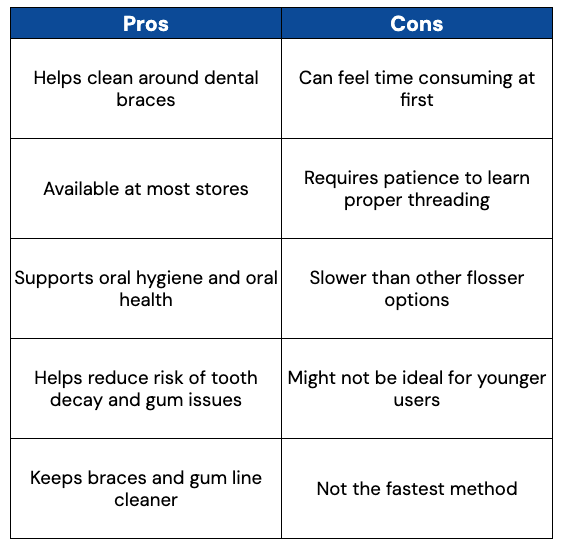
Pros and Cons of Traditional Flossing with Braces
Not sure if this method is right for you? Here’s a quick look at the pros and cons to help you decide.
Using a Floss Threader for Braces
If you are wearing braces, a floss threader can help you clean between your teeth more effectively. This small plastic tool guides waxed floss under the wire of your dental braces, making it easier to keep your mouth clean and prevent tooth decay. It is a great way to support oral hygiene when a toothbrush cannot reach certain areas.
Using a floss threader requires a little time, but it plays an important role in maintaining good oral hygiene and supporting long-term oral health.
Step-by-step instructions:
-
Cut the floss: Start with about 18 inches of waxed floss. This type of floss slides more easily around brackets and is less likely to tear.
-
Insert into threader: Place one end of the floss into the loop of the floss threader.
-
Guide under the wire: Use the stiff end of the threader to gently insert the floss under the arch wire, between two teeth.
-
Floss gently between teeth: Once the floss is under the wire, hold each end with your index fingers and move it gently between the teeth and under the gum line. Avoid snapping to prevent injury.
-
Pull out and repeat: Carefully pull the floss out and move to the next tooth. Repeat the process for each gap between your brackets.
Pros and Cons of Using a Floss Threader
Before deciding if this method works for you, here’s a quick look at the benefits and challenges:
Using a floss threader is a simple but powerful way to care for your oral health while wearing braces. If you take your time and floss gently, this tool can make your daily oral hygiene routine much more effective.
Water Flosser: A Modern Solution
If wearing braces makes traditional flossing difficult, a water flosser might be your new best friend. This tool uses a steady stream of water to remove food particles and plaque from tight spaces between your teeth and around your dental braces. It's a helpful option for maintaining good oral hygiene without the hassle of threading floss through every bracket.
How to Use a Water Flosser:
-
Fill the reservoir: Use lukewarm water for comfort and fill up the water tank.
-
Choose your tip: Insert the flosser tip into the handle. Some models come with special orthodontic tips for braces.
-
Set the water pressure: Start with a low water pressure setting to avoid any discomfort, especially if you are new to it.
-
Lean over the sink: This keeps the water from making a mess.
-
Clean your mouth: Place the tip inside your mouth, aim it along the gum line, and let the water flush out food particles and plaque.
-
Repeat until clean: Move slowly tooth by tooth, and floss gently around brackets and along the gum line.
Using a water flosser takes about two to three minutes and can be a great way to upgrade your oral hygiene routine.
Pros and Cons of Water Flossers
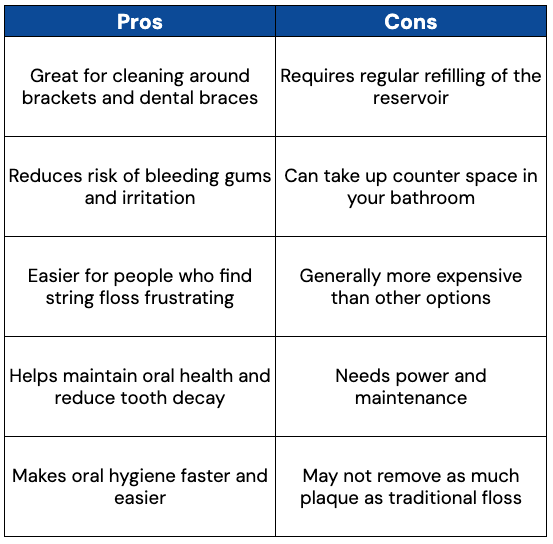
Water flossers are especially useful if you are wearing braces, have sensitive gums, or just want an easier flossing routine. They can be a helpful companion in your daily oral health routine and are often recommended by orthodontists as a good oral hygiene tool when traditional flossing becomes too tricky.
Dental Tape for Sensitive Gums
If you have sensitive gums and find string floss too harsh, dental tape might be a better fit for your flossing routine. It’s wider and flatter than traditional floss, making it easier for some people to use. Because of its shape, it can slide more comfortably between teeth and is less likely to cause bleeding gums.
Why Choose Dental Tape?
-
Gentle on Gums: Dental tape is softer than standard floss, making it ideal for anyone who needs to floss daily without irritating sensitive gums.
-
Efficient at Removing Debris: Its broader design helps sweep away food particles and plaque, keeping your braces clean and your mouth feeling fresh.
-
Supports Good Oral Hygiene: Using dental tape regularly can be an easy way to support good oral hygiene, especially for people who find flossing painful or awkward.
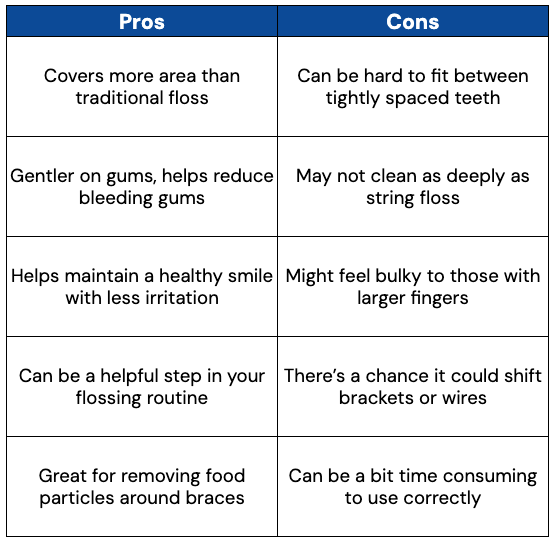
Pros and Cons of Dental Tape
Here’s a quick breakdown to help you decide if it fits your oral hygiene routine:
While dental tape isn't for everyone, it’s a solid option for those who want a gentler flossing experience. It works well with other tools like a water flosser or oral irrigators to create a well-rounded routine that supports a healthy smile.
Orthodontic Flossers: Simplifying the Process
Orthodontic flossers are small plastic tools designed specifically for flossing with braces. To use the Harp Orthodontic Flosser, guide the small end under the archwire to floss.
Platypus Orthodontic Flossers simplify the process for braces wearers by requiring no threading and allowing quick flossing in under two minutes. These flossers effectively remove plaque, food, and bacteria, making them an excellent choice for maintaining oral hygiene with braces.
Benefits of Orthodontic Flossers
Orthodontic flossers provide numerous benefits for those with braces:
-
Harp orthodontic flossers require no threading, making them easier for kids to use effectively.
-
These flossers can be reused for up to a week, providing a quick solution for busy individuals.
-
Platypus orthodontic flossers are designed to fit comfortably under arch wires, simplifying the flossing experience.
Moreover, orthodontic flossers are effective at removing plaque, food, and bacteria from around braces, contributing to better oral health. They are a convenient and efficient tool for those looking to maintain their oral hygiene without the hassle of traditional flossing methods.
Limitations of Orthodontic Flossers
Despite their benefits, orthodontic flossers do have some limitations. A month’s supply of Harp orthodontic flossers costs approximately $5. While reasonably priced, Platypus orthodontic flossers are often sold in bulk packages, which may not appeal to all consumers.
Moreover, Harp orthodontic flossers can be difficult to find in local pharmacies or online stores. Cost is an important factor for consumers considering orthodontic flossers, and availability issues can make it challenging to consistently use these tools.
Maintaining Good Oral Hygiene with Braces
Keeping your mouth clean while wearing braces takes a little extra care, but the payoff is a bright, healthy smile when treatment ends. A good hygiene method makes all the difference.
Here’s how to stay on track:
-
Visit Your Dentist Regularly: Schedule check-ups with your dentist at least every six months. These visits help spot early signs of cavities, plaque, or gum issues before they turn into bigger problems. Some orthodontic services may also include in-office cleanings tailored for braces wearers.
-
Brush and Floss Consistently: Brush twice a day using small circular motions and make sure to aim at the gum line. Use a flosser or other flossing tools to clean between brackets and wires. This helps prevent cavities and keeps your oral health in check.
-
Don’t Skip the Rinse: Using a fluoride rinse can give your enamel extra strength and help prevent cavities, especially around brackets where food particles can get stuck.
-
Wrap and Go: Keep wax and wrap strips handy for irritated spots caused by wires. They can prevent discomfort and help you stick to your routine.
-
Stick to Your Method: Everyone’s mouth is different. Some people do better with a flosser, others prefer string floss. Find what works best and make it a habit. A solid method you can stick with is more important than the fanciest tool.
By committing to daily care and visiting your dentist regularly, you’ll keep your braces clean, your gum line healthy, and avoid long-term problems like cavities or decalcification spots.
Choosing the Right Orthodontist
Picking the right orthodontist is one of the most important steps in your braces journey. After all, braces are a big investment, and you want someone who really knows what they’re doing.
Look for an orthodontist who offers more than just straight teeth. A great provider will:
-
Focus on patient-friendly hygiene coaching
-
Use modern tools and technology-enabled care
-
Provide hands-on hygiene tutorials in the office
-
Offer virtual check-ins to keep tabs on gum and oral health between visits
A good orthodontic practice should help you understand how to care for your braces properly, from brushing techniques to managing discomfort. When your orthodontist supports both your smile and your hygiene routine, your treatment is more comfortable, more effective, and more rewarding.
Choosing the right expert means you're not just getting straighter teeth—you’re getting a healthier smile, too.
Final Thoughts
Flossing with braces might take a little more time, but it’s worth the effort. It helps prevent cavities, keeps your gums healthy, and makes sure your smile looks its best once the braces come off.
Whether you use a floss threader, water flosser, dental tape, or stick with traditional flossing, the key is to find a method that works for you and floss regularly. Pair that with brushing, a good mouthwash, and regular visits to your dentist or orthodontist, and you’re setting yourself up for a smooth treatment and a confident smile.
Looking for more ways to keep your braces clean and your smile healthy? Explore gentle, effective tools and tips from trusted brands like SNOW, designed to make your routine easier and more enjoyable.
Frequently Asked Questions
Why is flossing important for people with braces?
Flossing is crucial for people with braces because it helps clean those tricky spots between the brackets and wires, preventing gum disease and tooth decay. Keeping your mouth healthy will ensure that you achieve that beautiful smile!
What is the recommended tool for flossing with braces?
A WATERPIK water flosser with the Orthodontic tip is your best bet for effective flossing with braces. It makes the process quicker and easier!
How often should you floss your teeth when you have braces?
It's really important to floss once a day when you have braces to keep your teeth and gums healthy. This will help you avoid plaque buildup and keep your smile shining!
What should you do if dental floss gets stuck in your teeth?
If dental floss gets stuck in your teeth, gently wiggle it back and forth to free it, and if that doesn't work, try using waxed floss next time for a smoother glide.
How often should you schedule dental cleanings while you have braces?
It's best to schedule dental cleanings every three months while you have braces to keep your oral health in check. Regular visits help prevent issues and maintain a bright smile!


![Clove Oil for Toothache Relief [Does it Really Work]](http://www.trysnow.com/cdn/shop/articles/clove_oil_for_toothache_does_it_really_work.png?v=1755777694)